Cisco CUCM v12 – OS Administration warning
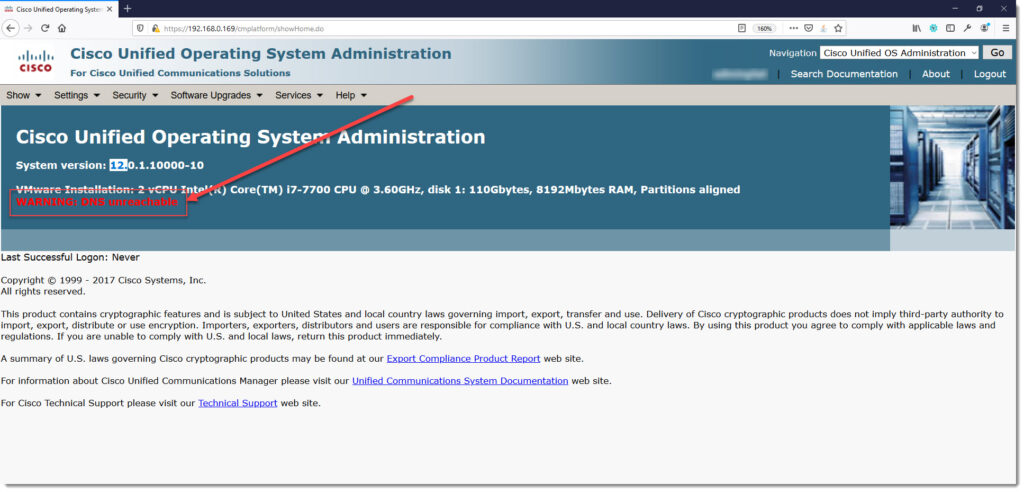
As you can see in the screenshot below, Cisco CUCM v12 shows a red warning telling you about a DNS unreachable issue that has been detected and needs to be fixed.
How to check DNS via web GUI
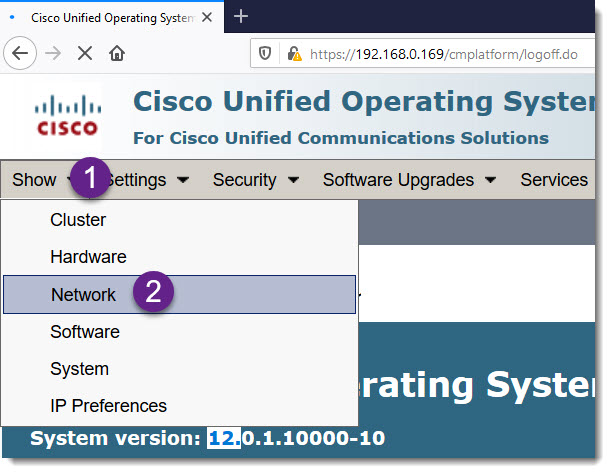
The first place to go to start troubleshooting the DNS issue is inside the Cisco CUCM v12 OS Administration, see the screenshot below.
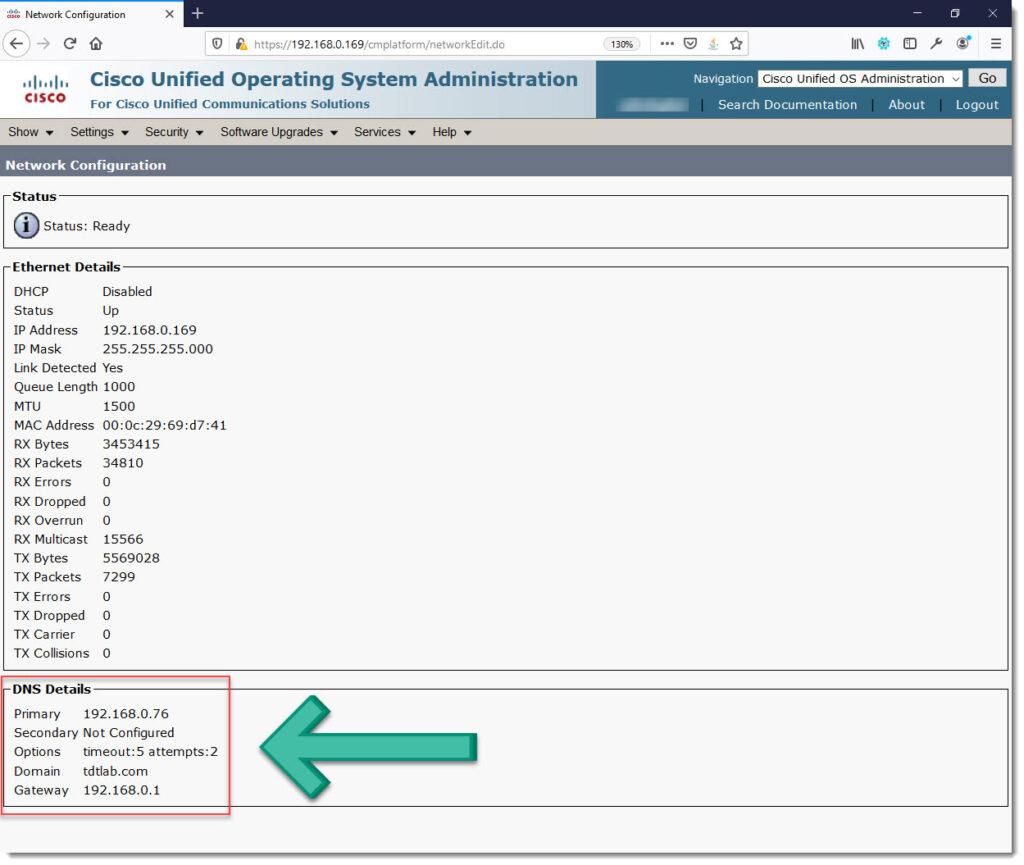
Once you open the Network option go to the bottom of the screen to see DNS Details.
Check DNS using the CLI
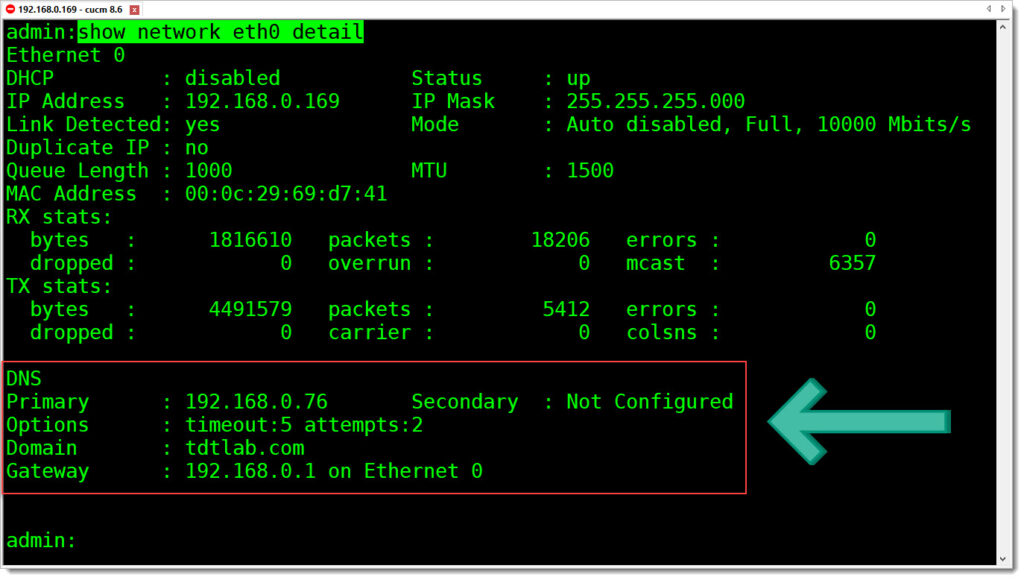
Cisco CUCM v12 has an specific command to be used in the CLI that allows you to see all the network related data, here once again, go to the bottom of the output to see the DNS details.
show network eth0 detailProblem solved – wrong DNS IP Address
In this particular case the issue can easily fixed by changing the IP Address of the DNS server (Primary), as you can see 192.168.0.76 is no longer available, the new DNS server IP Address is now 192.168.0.21 and we can verify that as follow.
Check DNS entries via CLI using “nslookup”
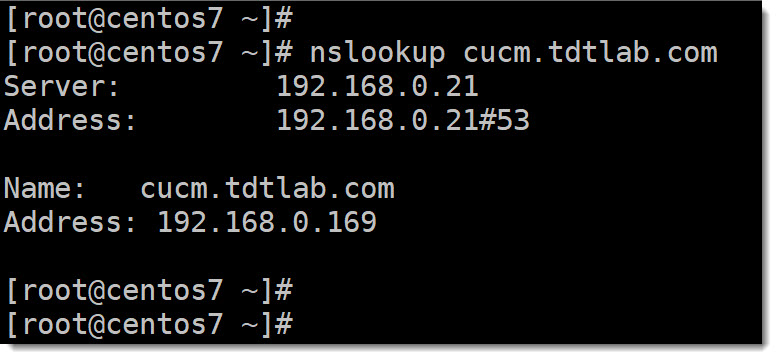
The DNS forward entry can be tested by using the hostname as you can see below.
nslookup cucm.tdtlab.comThe DNS Reverse entry can be tested by using the IP Address as you can see below.
nslookup 192.168.0.169Connectivity check using ping
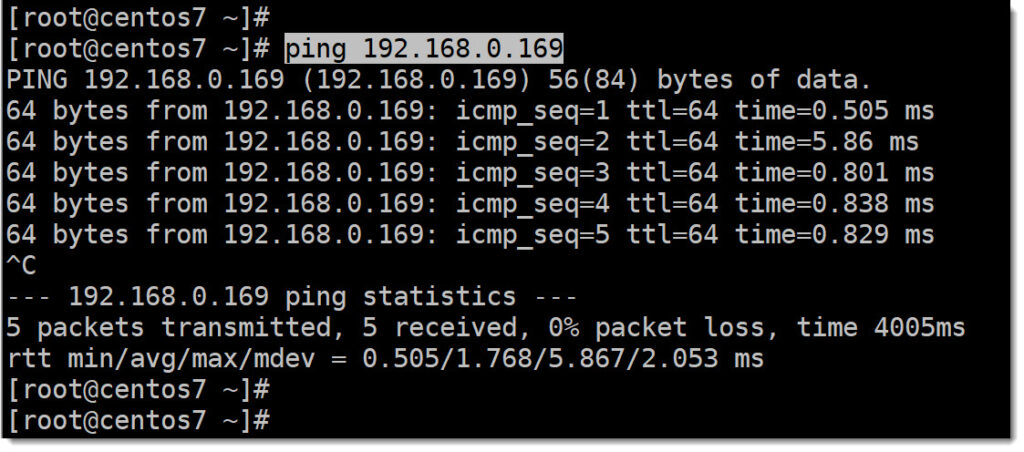
Now that you know your DNS entries are there you can do a basic connectivity check using ping, from your DNS server to your CUCM server.
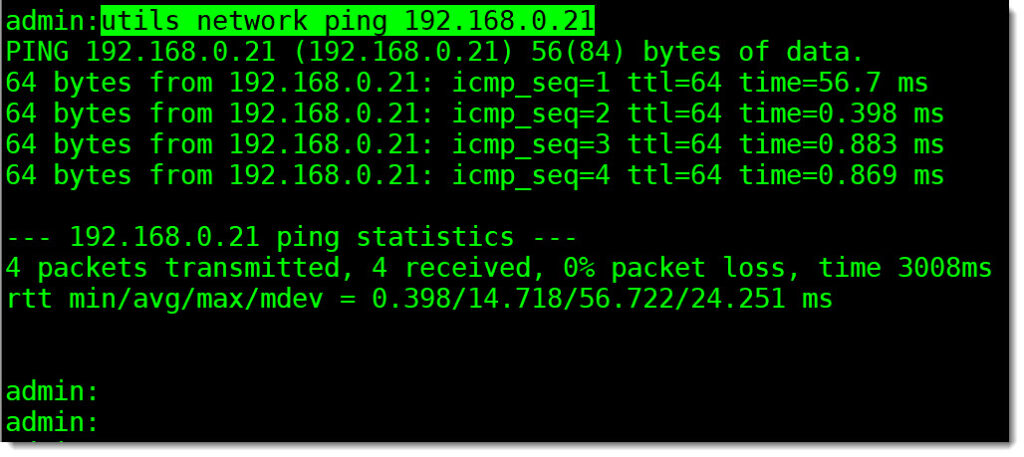
ping 192.168.0.169Immediately after using ping from DNS to CUCM you can ping the oposite way, that is from your Cisco CUCM server to DNS.
utils network ping 192.168.0.21Ping from CUCM to DNS using the web GUI
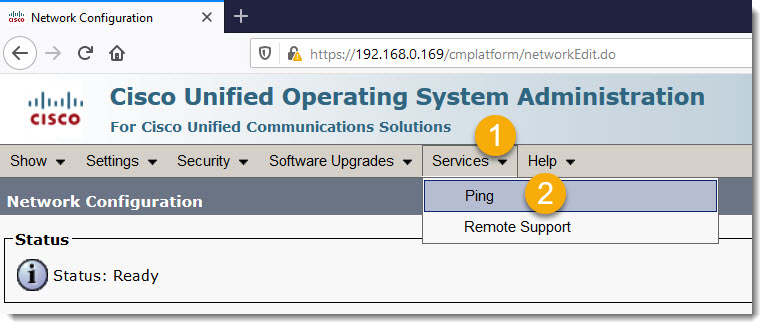
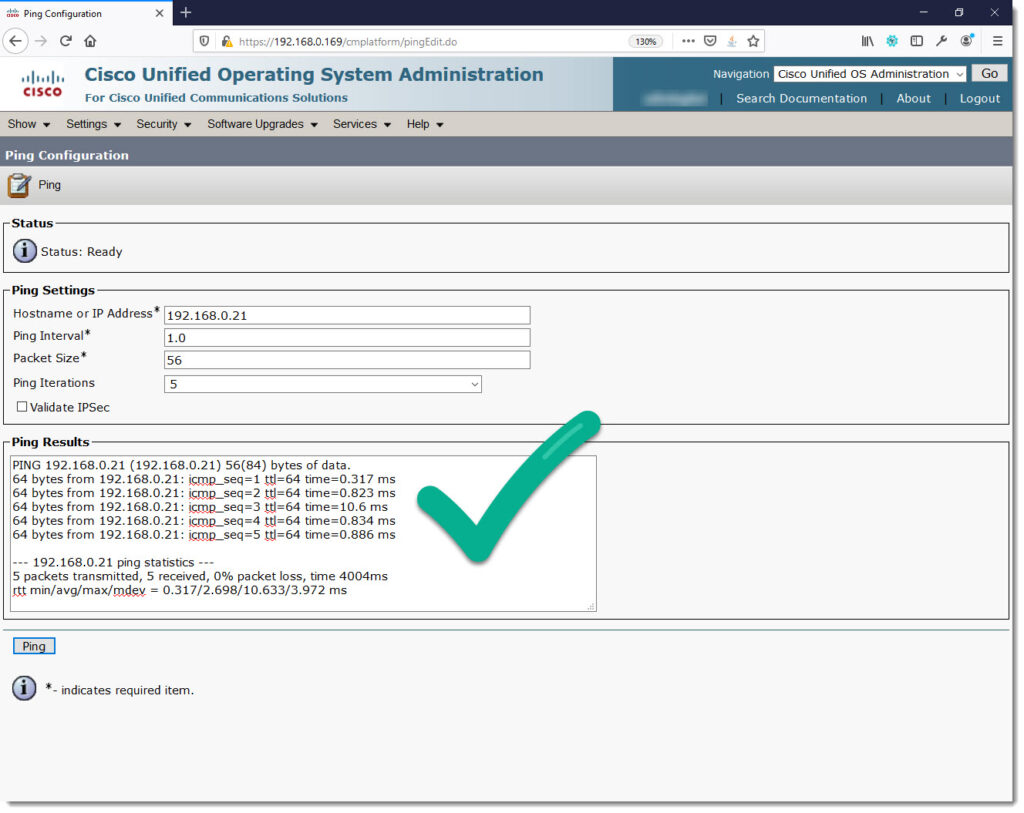
Even though we’ve tested the connectivity from CUCM to DNS via the CLI, there is another good practice, I’m talking about checking connectivity using ping from the web GUI.
The ping tool provided by the CUCM web GUI allows you to set the IP Address, Ping interval, Packet Size and also the amount of iterations.
Set the new DNS IP Address
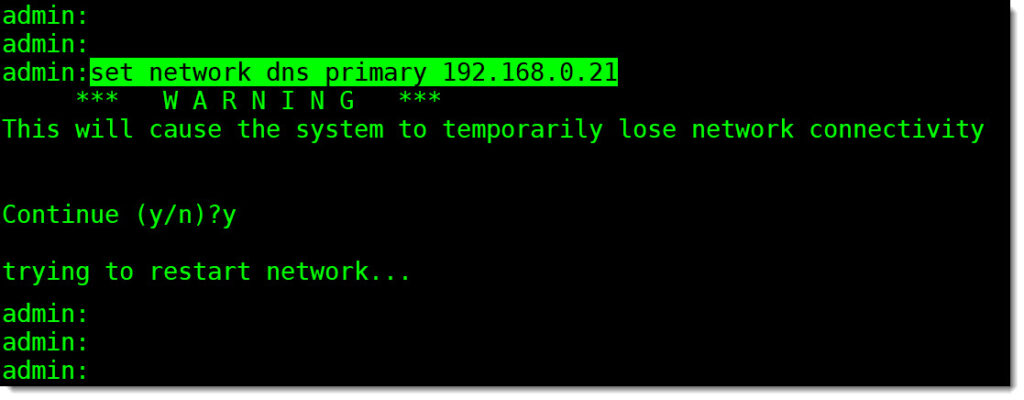
Now that you are absolutely sure your new DNS is properly configured, I mean, it has both Forward and Reverse entries and on the other hand the connectivity between CUCM and DNS is working fine, you can proceed to set the new DNS IP Address as follow.
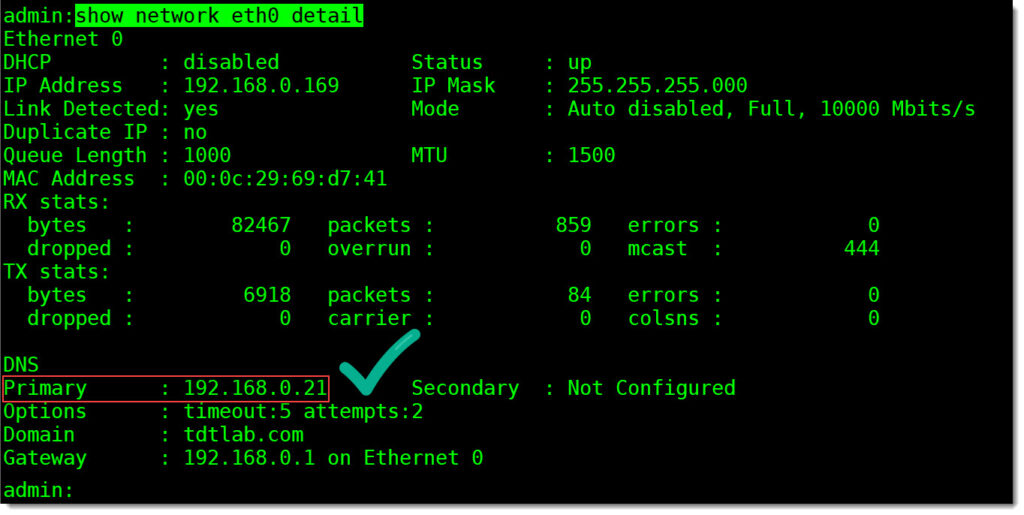
set network dns primary 192.168.0.21Use the following CLI command to see the new IP Address has been assigned.
show network eth0 detailVerify DNS resolution
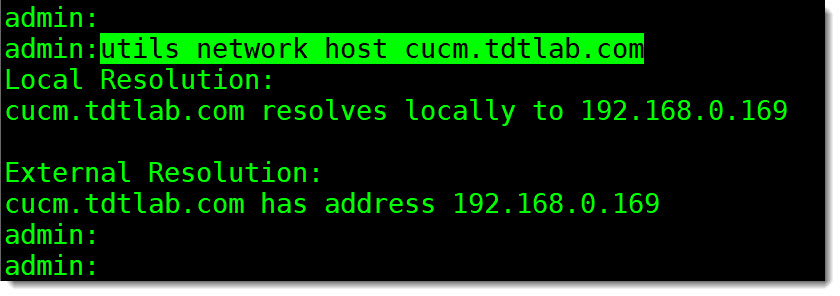
utils network host 192.168.0.169utils network host cucm.tdtlab.comProblem solved – Warning has been removed
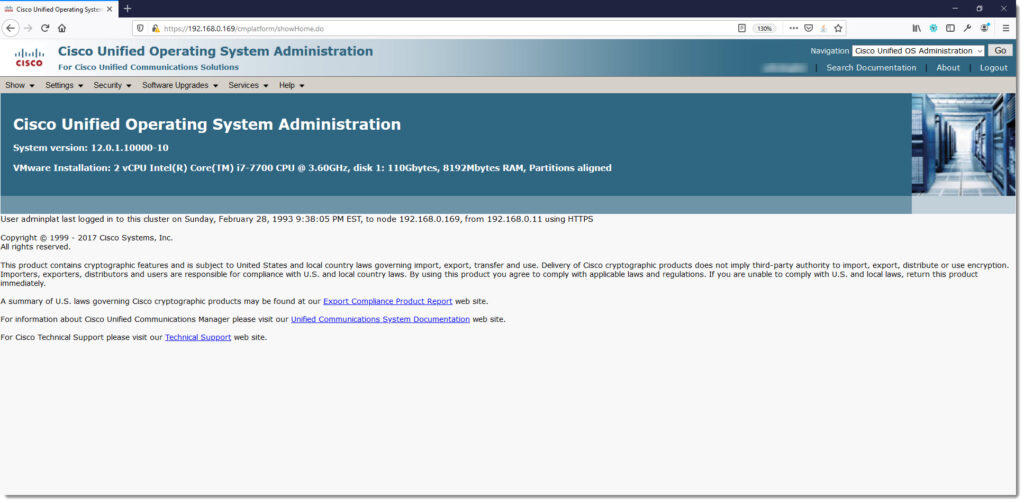
The definitive proof of DNS working fine is a clean OS Administration home page, congratulations! Job well done.
